Sowing Seeds
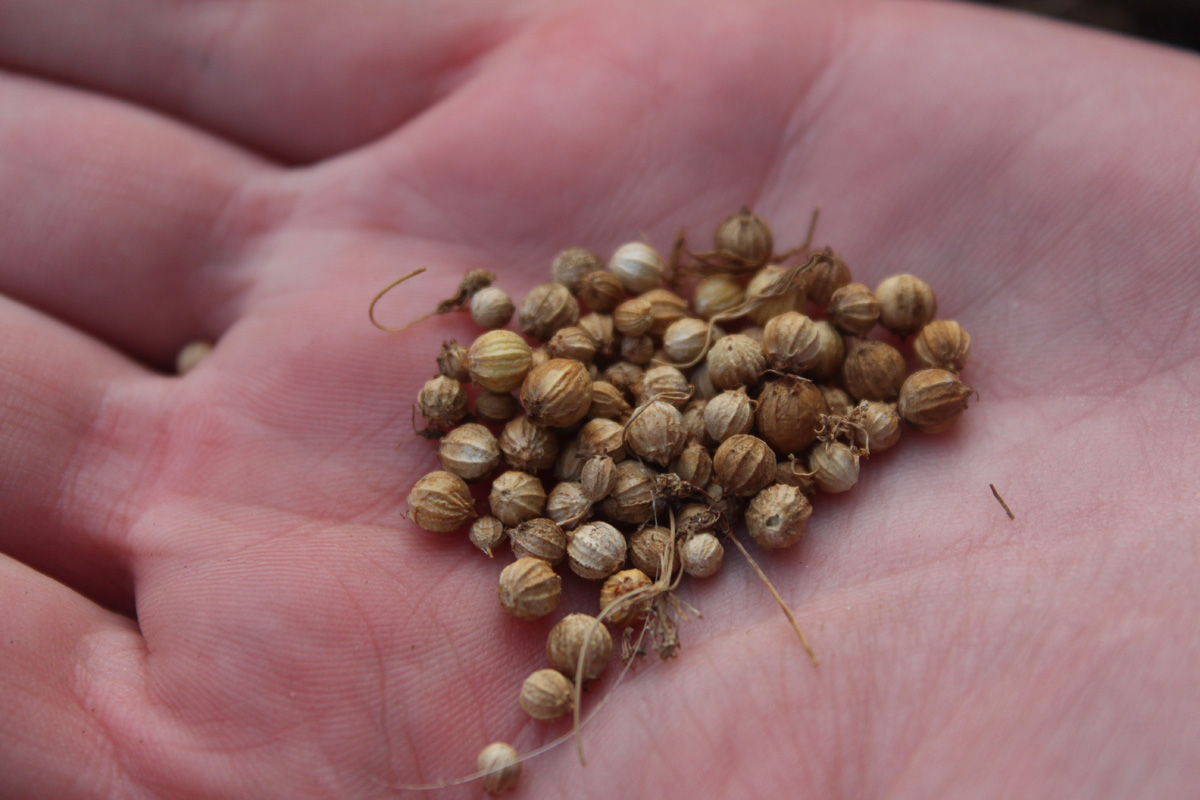
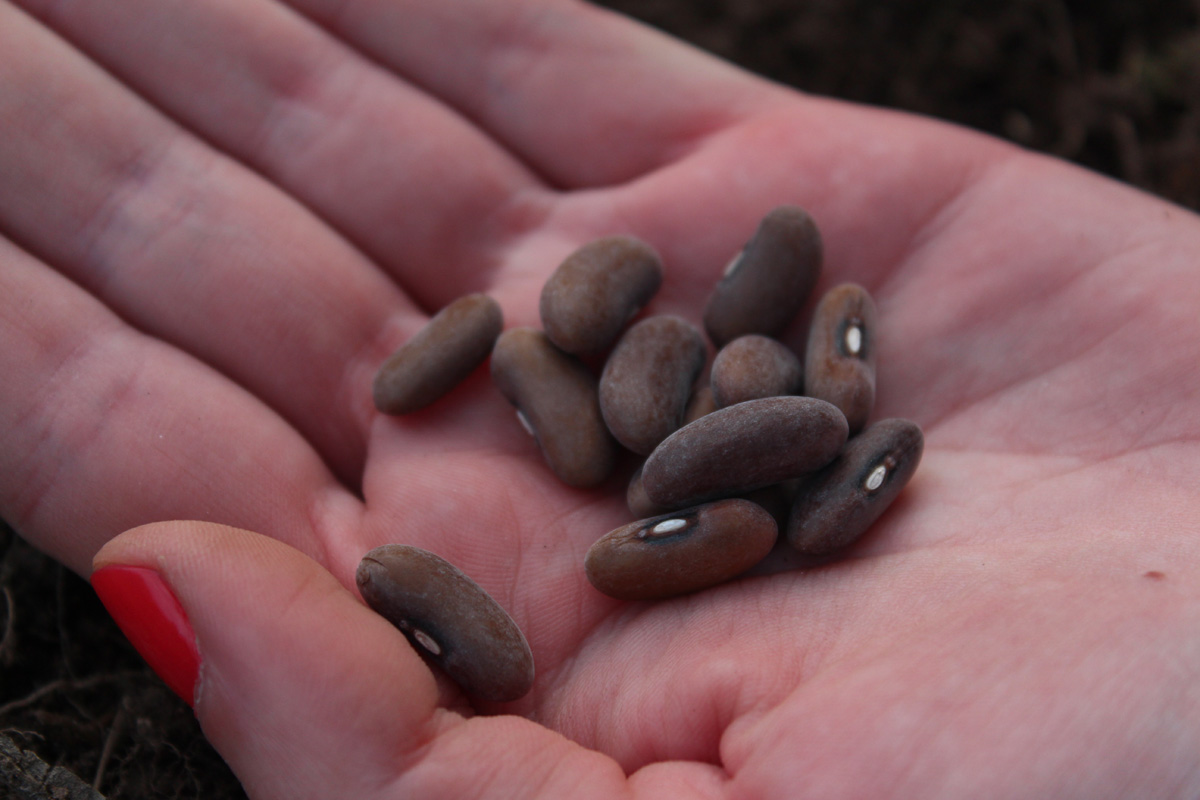
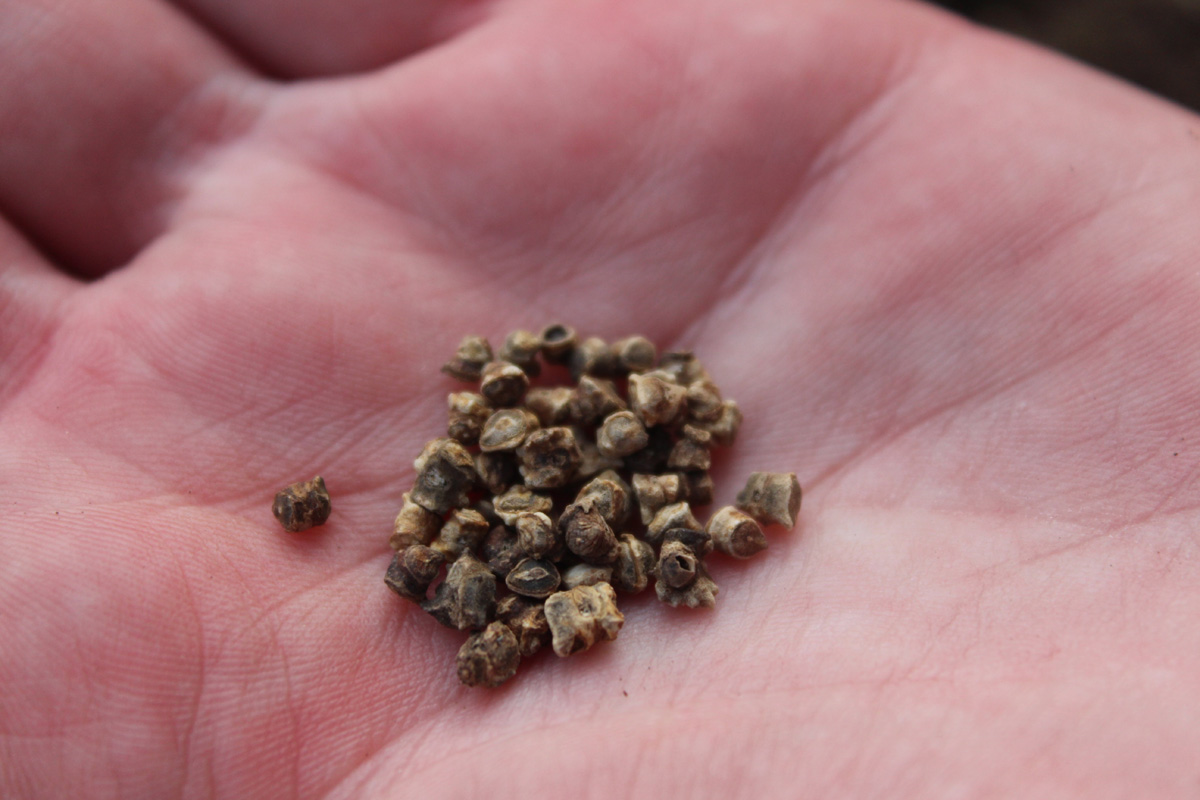
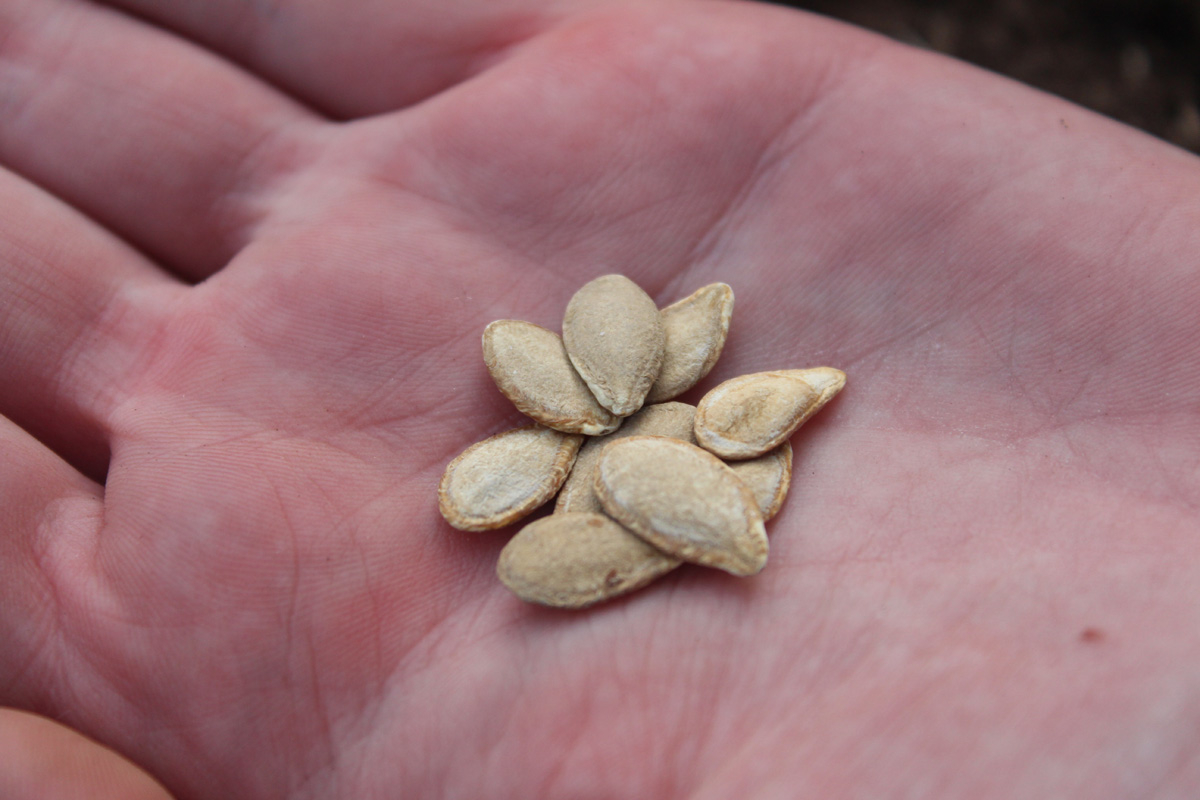
It’s the last week of winter and I’m really excited about getting my large seeds sown directly into the vegetable patch. Today I’m planting the first crops of corn, green beans, coriander, beetroot- I’ll plant a second round of these seeds in about 4-6 weeks to prolong the harvest. I’m also planting a watermelon and a pumpkin- these guys are going to take up lots of space, so there is only one of each.
To start off, I went through the soil again to remove any large lumps of grass. I turned the soil with a pitchfork to make sure all the pea straw mulch, compost and cow poo is mixed in well. I feel like I massacred lots of worms in this process, which is a shame as they help to improve the soil structure. Then I raked over the surface with a garden rake to even out the soil and ensure a good planting surface for the seeds.
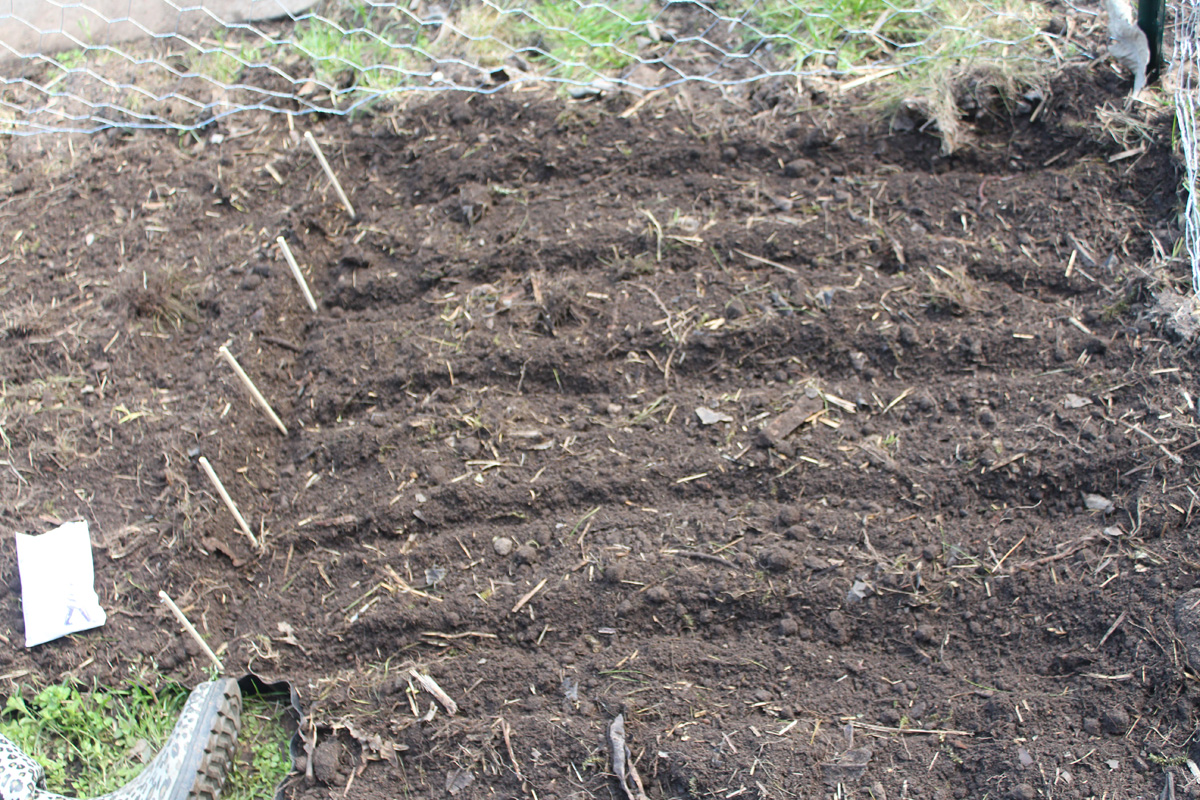
Pretty much all the seeds I planted today need to be spaced about 10-15 cm apart. The greedy watermelon and pumpkin get 1-2 meters each of garden space. I’m thinking of growing some quick crops near them that will be ready for harvest by the time they completely take over the garden! I roughly measured out spacing between rows and marked with chopsticks, covered the seeds over and watered in well.
Given the time of year I shouldn’t have to water again until they germinate, as the soil is retaining moisture pretty well. This is particularly the case for the beans and the corn, as I don’t want them to get waterlogged and rot in the ground.

Preparing the Plants
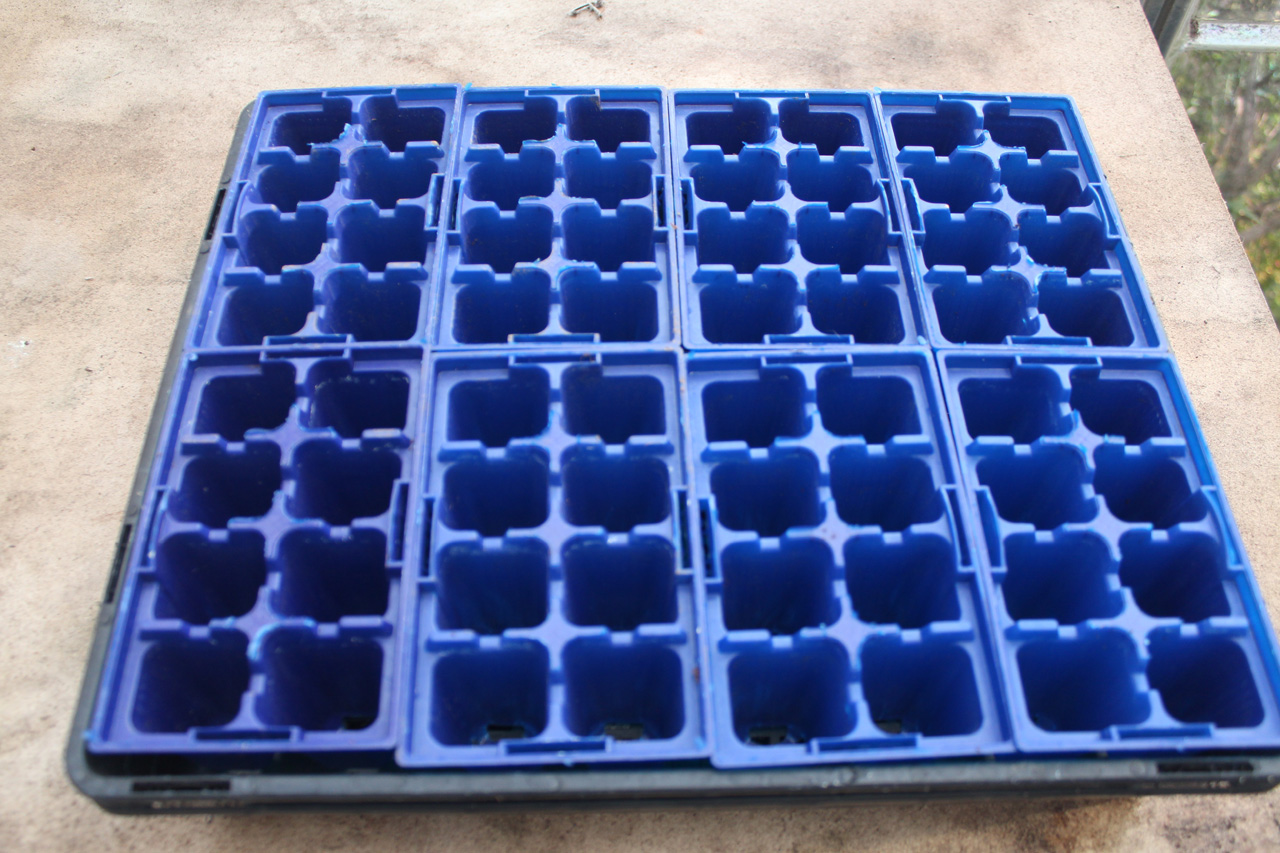
While I wait a few weeks for the soil to settle and for the temperature to heat up, I am starting my seeds early in the greenhouse. I have already planned out what I am planting and how many plants I need to grow to fill the Backyard Farm. So the first step for preparing the plants is sterilising my propagation equipment. This involves rinsing off the potting trays and the soaking them in a 50:50 mix of white vinegar and water. An alternative is to use a diluted bleach and water solution, but I prefer not to use harsh chemicals where possible. Once the punnets have soaked for about 15 minutes, I give them a rinse in fresh water and dry them off ready to be filled with seed raising mix and seeds.
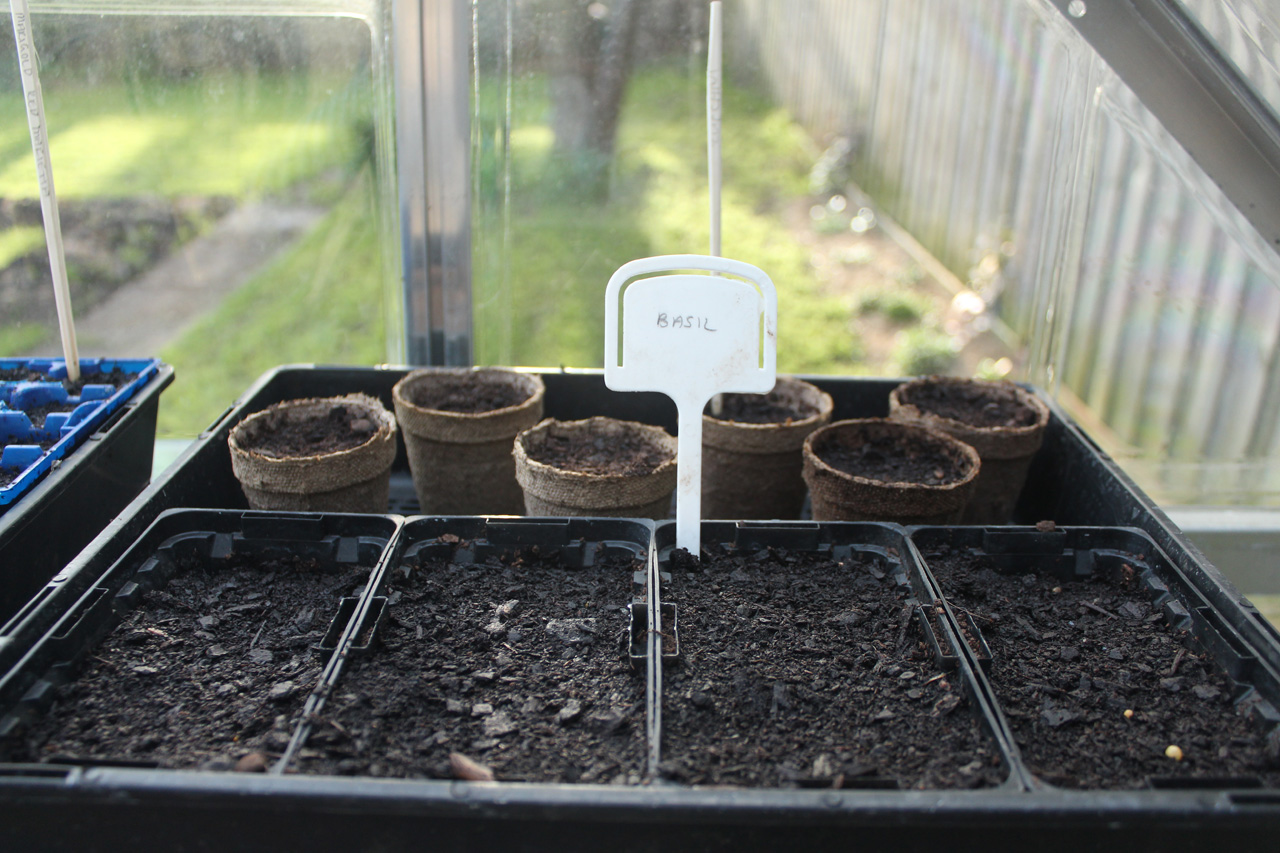
I’m planting seeds of hugely varying size, from the large ones like zucchini and cucumber to tiny Rudbeckia seeds. Always follow the specific growing on the packs, but generally speaking it is best to plant things like zucchini and cucumber either direct into growing position, or, as I have done, into peat or jiffy pots that mean that the roots won’t be disturbed when replanting. Other seedlings like basil, tomato, eggplant, capsicum and leek can go into punnets. I’m saving the corn, beans and melons for direct planting in a week or two.
I make sure everything is labelled and in order in the sunniest spot in the greenhouse, and keep the seeds moist while they germinate over the next week or so.

Adding Structures
It seems that I am doing weekly trips to the not-so-local hardware and gardening stores. Today’s purchase included garden edging. I wanted something that could be:
- easily removed (as the beds cannot be permanent);
- either look good or be hidden; and,
- would block grass and weed roots from creeping into the garden beds.
I ended up going with a lightweight black plastic edge that turned out to be excellent for all of the above and also great at going around the square corners of the patch.
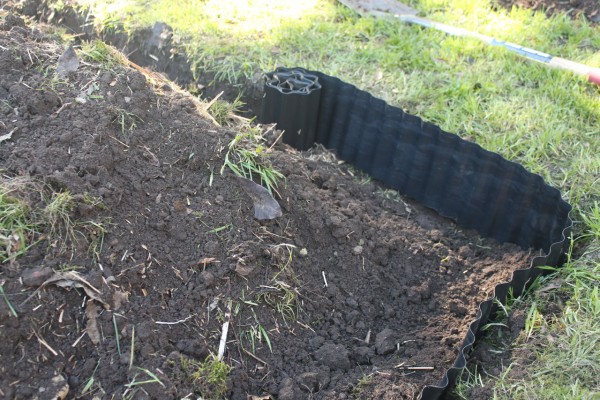
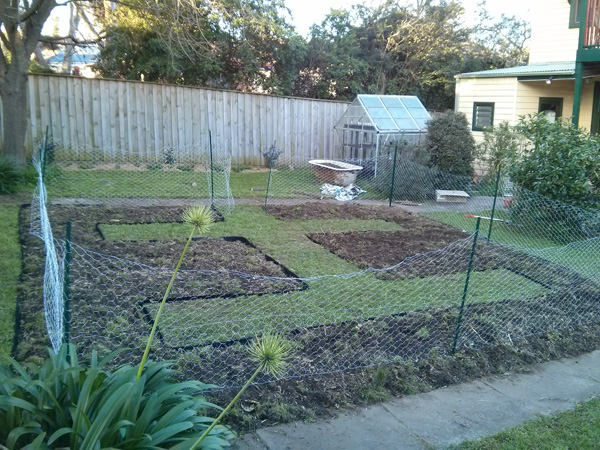
The process was to sharply re-dig the edge of the patch, and lay out the edging with a minimal amount of plastic above the final soil surface. I back-filled with the soil as I went in order to keep the edging in place. Once again, a few tree roots had to be severed to ensure that the edging could be evenly laid. Once the edging is in place, the beds look much neater and it is easy to even out the soil in the beds.
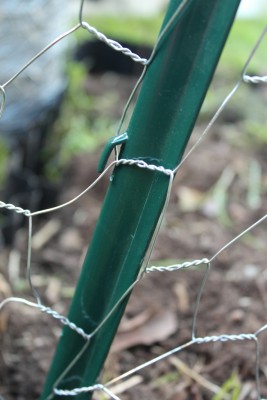
The next step is to get the chicken wire fencing up- this is to act as both a support structure for growing climbing vegetables, as well as a tool to keep out our pooch, who finds digging in loose, fertilised soil particularly tempting. We are using really innovative steel posts that make attaching wire easy- all you have to do is loop and stretch the wire over the lugs (small hooks) that hold the wire in place. We are enclosing the vegetable patch on all sides, and will make some sort of gate at a later stage. For the moment, some extra chicken wire will suffice!
With the soil dug through, the edging in and the fencing up, it is really starting to look like a great space to grow vegetables!
Digging
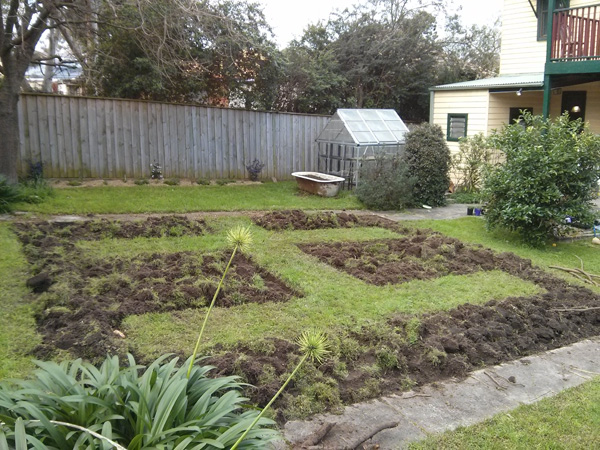
The official dig has begun!
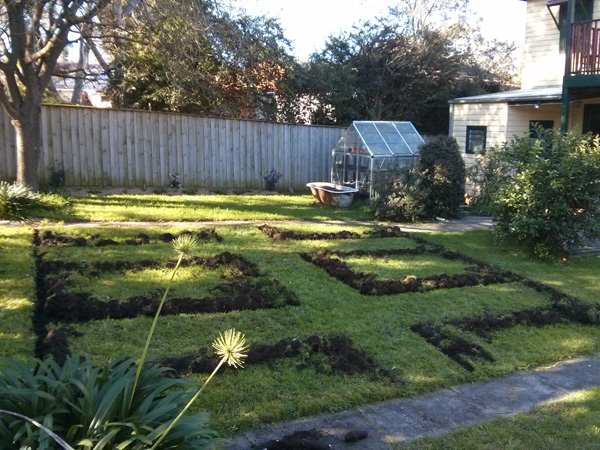
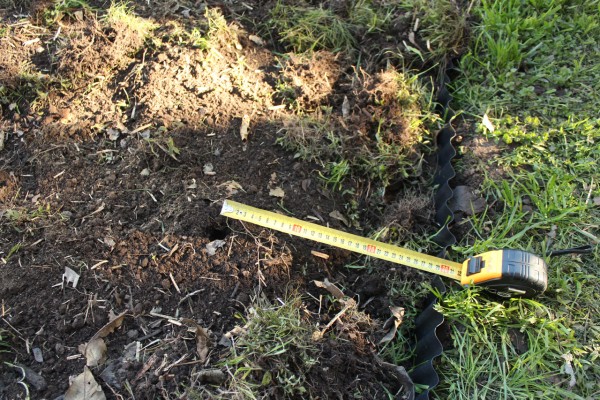
Of course, before spade met earth, we measured out our edges and tried to get them as straight as possible. I tried to be flexible with the planned measurements so that we could maximise arable space in the plot. One of the things that complicated the dig was the tree roots from the nearby Chinese Pistachio tree- but the mattock made short work of the roots!
It was great to get the edging dug out so that there was a real visual of what the finished plot would look like. Once the edging was done, the back-breaking work of digging up the grass started. I could have made my life easier by killing off the grass using newspaper, cardboard or something else to block the light. In the end, I thought about going to the newsagent to ask for old newspapers pretty much every week for 5 weeks and did nothing about it.
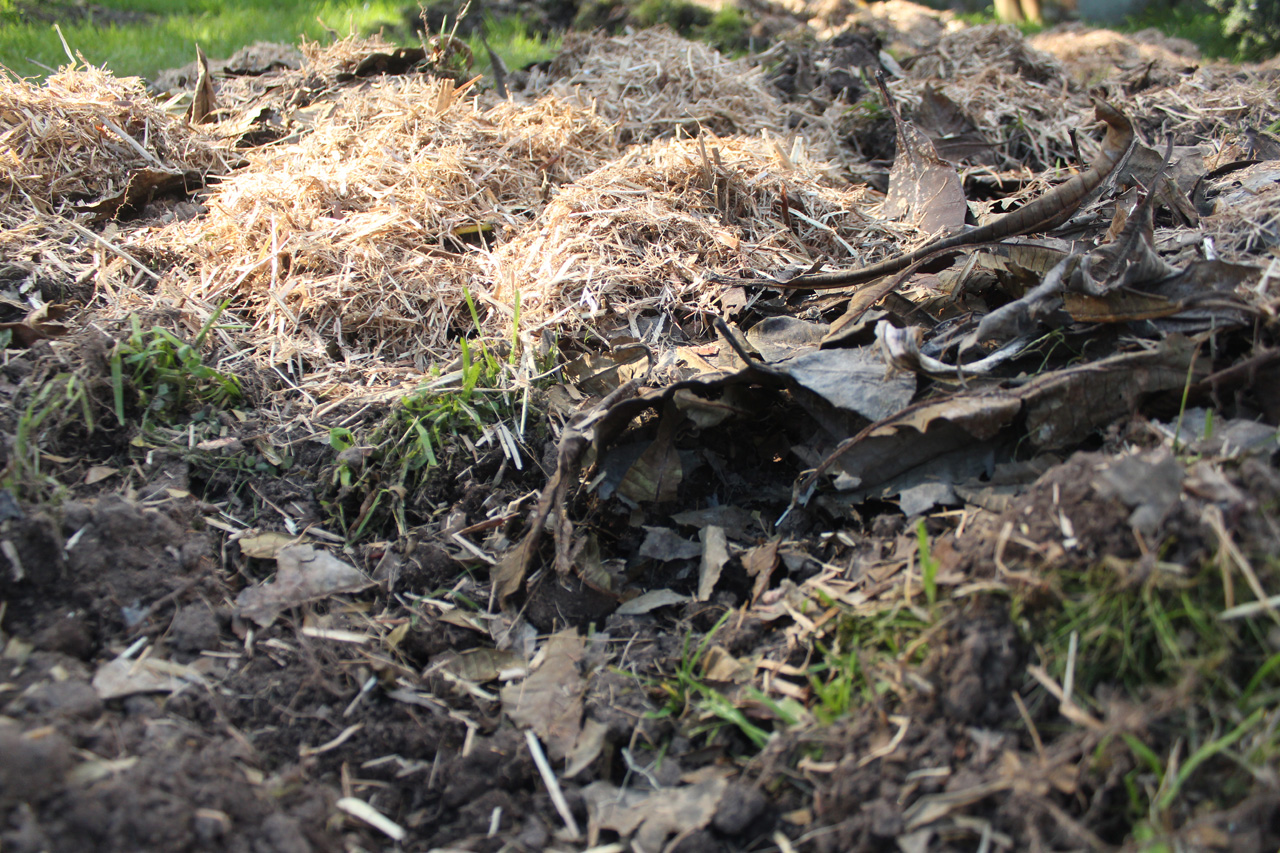
Once the grass had been dug up, I started to add ingredients to improve the soil. The first addition was a large pile of autumn leaves- I put these in an old washing basket and stomped on them to break them into smaller, easy-to-decompose bits. I layered this onto the beds with store-bought pea straw mulch, blood-and-bone, organic compost and cow manure. This mix is designed to add air, structure and microorganisms to the soil, helping to create a rich growing environment for the plants.
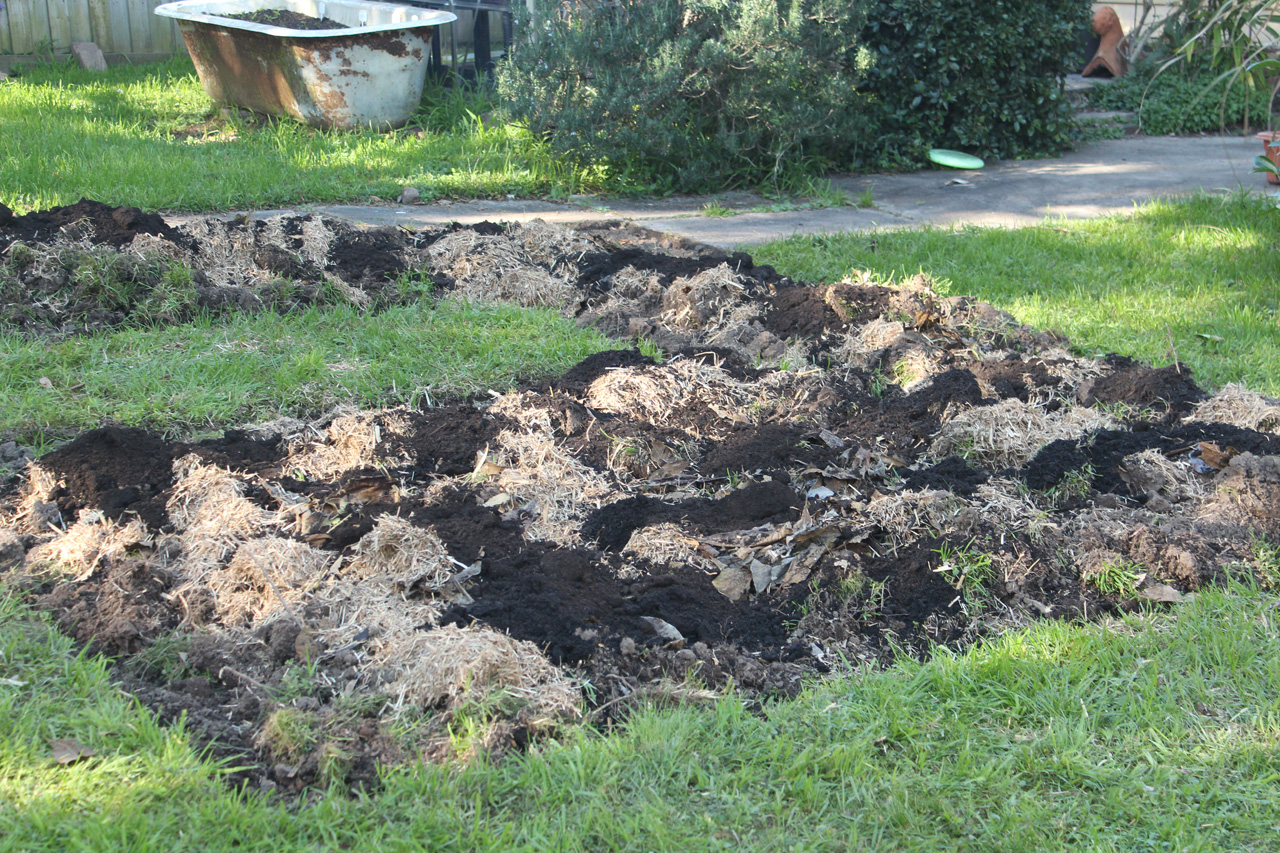
The next task was to dig through all the materials and ensure an even distribution. The idea is to do this about 2 weeks in advance so that the soil and the fertilisers have time to “settle” before planting out seeds or seedlings. Because I didn’t kill off the grass prior to digging, the settling period can also be used to turn the soil every week or so in order to ensure all the grass and freshly sprouting weeds and seeds gets killed off by lack of sunlight.
Planning
The newest addition to The Backyard Farm is the extended, self contained vegetable plot that sits happily in the middle of what was once our family cricket pitch. I have been frustrated by a lack of space in the side fence vegetable patch – particularly since I have commandeered most of the space for nectarine and peach trees. The new large vegetable plot existed in my mind for at least 12 months before the ground was broken.
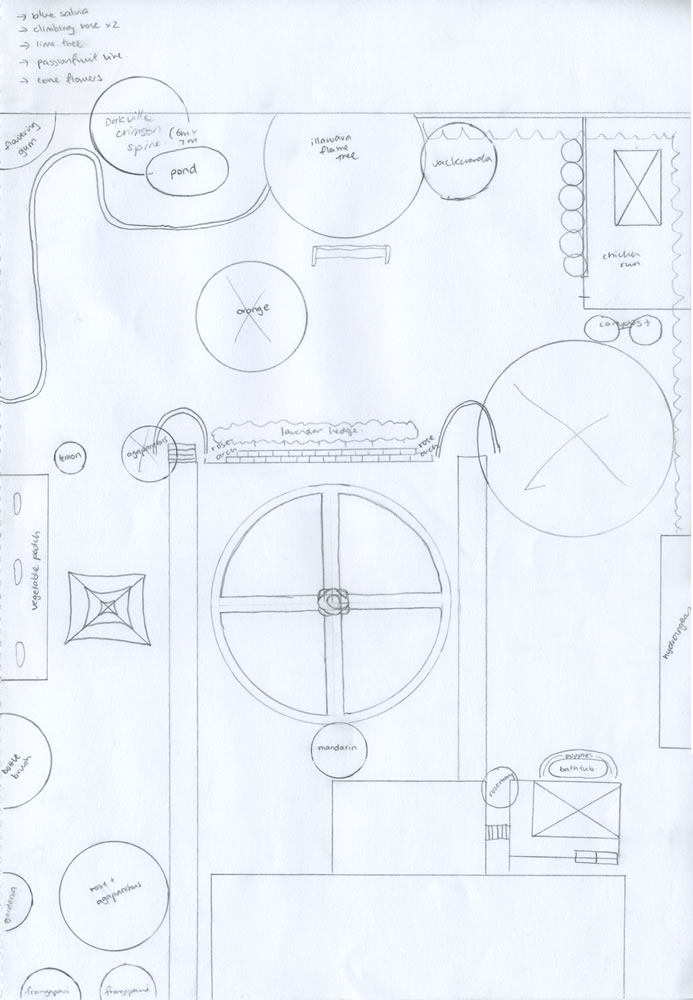
The ideal version of the plot was a vegetable parterre, formal in design with a circular bed, gravel pathways and, of course, a bird bath in the centre. I must admit that this may have been influenced by my most recent visit to the Luxembourg Gardens, but hey if you are going to dream, dream big right? In any case the first, formal design was impractical for my space for several reasons:
- It needed to be a semi-permanent design that could be returned to lawn if I moved house
- It needed to maximise planting space for vegetables
- I wanted to be able to easily reach all parts of the garden for planting and weeding without walking on the beds
- I needed to be able to fence it off to keep the lovely Buster (our dog) from “helping” with digging up the plot
And chicken wire just doesn’t seem to match formal garden design… so, the end design is more of an “English” kitchen garden style, with turf paths rather than gravel, and regularly spaced, practical beds to work with.
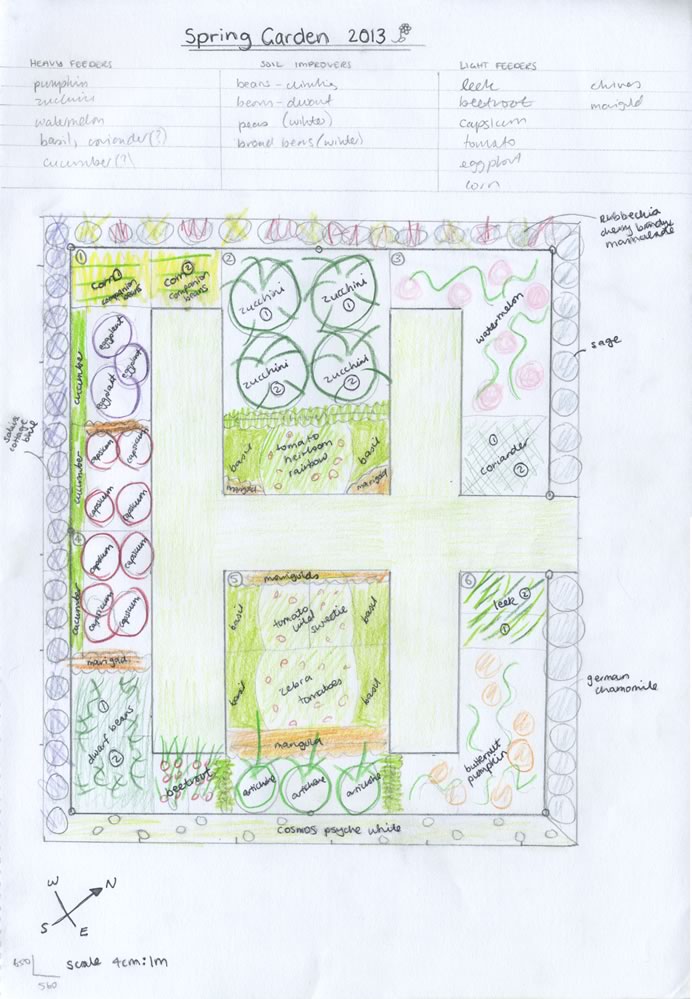
Aesthetics is another element of design that concerned me, as you can see the vegetable plot from the back deck and kitchen window. This is half the reason for the 30cm flower border around the plot. The other half is, of course, to do with encouraging plant biodiversity and attracting bees and other friendly insects. The screening flower of choice for the view from the house is Cosmos Psyche White, which can get quite tall and will, hopefully, somehow make the chicken wire appear more attractive!
